Tuesday, October 27, 2015

Quick Halloween Costume- Sugar Skull

)My daughter is part of student council at her school, and this year they threw a spooky Halloween party.  I needed a quick costume, and decided to learn how to do some 'Some Day of the Dead" make up and be a sugar skull.  Thanks to the video below I was able to create this look.  I had to do a lot of substituting because I didn't have the same make up, but I think it turned out pretty good :)

Thank you mayratouchofglam for the tutorial!
Make sure you check out her video :)


Saturday, October 10, 2015

DIY Spooky Skull and Brain Bath Bombs

I hope you enjoy this pic tutorial :) Here is a link to a video that shows the finished product.https://youtu.be/jB_zj6ef2Sk Have fun!


Monday, September 28, 2015

How to Paint a Herring Bone Pattern

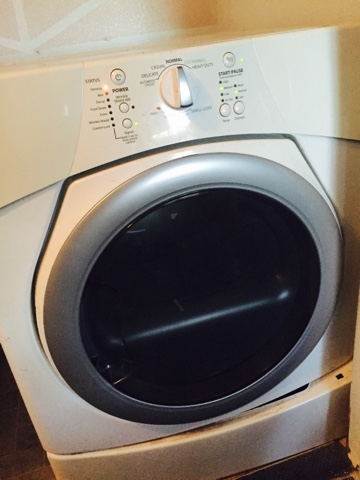
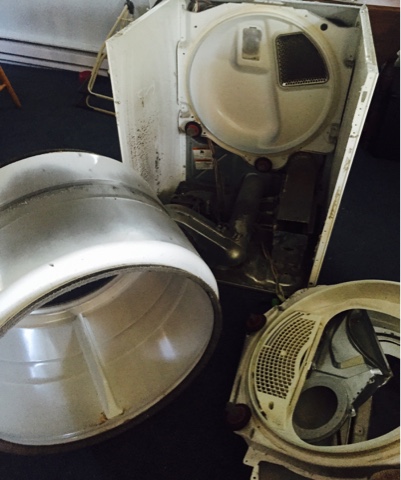
Since I had my dryer out to repair the other day, I decided to take the opportunity and clean out my laundry room. I have more of a laundry "closet" really instead of a room. I thought it would be fun to paint a pattern in my closet. I chose to do a "Herring Bone" pattern, and it ended up being pretty easy. Here is how I did it :)

For instructions pay attention to my pink arrows. I'll try to make this as least confusing as possible. Next time I do this kind of tutorial, I'll really try to talk more pics during the whole process.

Step 1: Using blue painter's tape, put one strip vertically placed from ceiling to floor smack dab in the middle of the wall.  My pattern did not go to the floor, so I made a horizontal baseline with painter's tape also. 
Step 2: Now figure out how many more vertical lines you want. The length of my wall is 80 inches, so every 20 inches I decided to have a vertical line. So my project went like this: left wall, 20in, 20in, 20in, right wall. I only had to lay out 3 vertical strips of painter's tape.
Step 3: Mark where you want to connect your painter's tape to your vertical lines. Every pink dot represents where I marked my tape for connecting. From ceiling to baseline my project measured 60 inches, so I decided to make it easy and mark my vertical tape strips every 10 inches.  
Step 4: Now you just connect the dots with your painter's tape. I started on my middle vertical line and worked my way down, then I did left and right sides. The arrows below are to help show where to start and end your strips.
Step 5: After you complete step four, all you do is paint! Go over all your tape  with a paint rolling brush and your choice of paint color. I like to remove the painter's before the paint dries too much. That seems to help keep your lines clean.

Here is a pic of my finished painting project! I love how it turned out, and really it was pretty easy :) 
I hope my directions were not to confusing, and hope you have fun with your own painting project :) 
I'm off to put my laundry room back together now that the paint is dry!

Saturday, September 19, 2015

How to Make Sidewalk Chalk Paint Water Balloons


My father in law and I were talking about painting with water balloons, and I immediately thought about how fun that would be to do with the kids. The only down part is it would be super messy, and hard to clean up. For my youngest daughter's birthday I bought her a sidewalk chalk painting kit with rollers and everything. As I was pondering the, "Painting with water balloons" idea, I thought back to that kit and aha an idea was born! Sidewalk chalk painting with water balloons!

How I made the paint is really easy. All you do is mix water and cornstarch in equal parts, add a couple drops of food coloring and stir. Note: For painting on the sidewalk you would want a thicker consistency so mix 1 part water to 3 parts cornstarch. Since I'm using water balloons, I wanted it to be more liquidy. 

Now how did I get the paint in the water balloons? Also easy :) I used a water bottle.
Just fill it with about 1 cup paint.

Put on the cap, and place on balloon.

Squeeze the bottle enough to get every drop of paint into the balloon.

And here they are :) You can kind of see the mixture separating in the balloon as they sit, so give them a little shake before you toss.

We had so much fun with this idea, here a video of how it went. 

Me vs. Whirlpool Duet Dryer

Is there nothing you can not learn to do from YouTube!?! This video taught me to change my own dryer belt! So awesome :) http://youtu.be/BO8IBoY-wlU 

Last week I was doing laundry, and I heard a loud "snap"! I looked at my dryer, and it stopped working. Since I have a family of 7, I wanted to get it fixed as soon as possible.  I assumed the belt breaking was the loud snap I heard, so I took off the front panel to check it out. The belt was dangling in the back for sure.  My father in law is actually an appliance repair man, so I told him my predicament. He suggest I order a "repair kit", because it's a good idea to replace common movable parts while I have the dryer open. The picture below is what came in my kit. 4- Drum Rollers, 1- Belt, 1 - Idler Pulley Wheel, Washers and some Tri-rings.

I only need 2 tools for this project, a flat head screwdriver and a 1/4 inch nut driver. Below is the nut driver :)

I have to admit that I was pretty scared when I got everything taken apart. My father in law said I could call him for back up if I needed, but I ended up getting it back together :)

This was a messy project for sure. Lint was every where, and it is amazing how much grease those drum rollers have. 

Ya baby, I did it!!! After putting the dryer back together and plugging it in I held my breath while I pressed the power button. Whew, it started right up and sounded quieter then ever :)

Its been about 4 days now since my repair, and the dryer is working great :)

Tuesday, September 8, 2015

EOS Handsoap

My oldest daughter is so smart and crafty :) She figured out how to combine two of my favorite things, EOS Lip balm and soap! She made an EOS portable hand soap. The EOS container makes carrying your handsoap around really convienent, and you don't have to worry about spills :)
First she cleaned her EOS container thoroughly, and boiled it for a couple minutes to get rid of all lip balm residue.
Next she cut up pieces of melt and pour soap, and heated it in the microwave using 15 second intervals. 

Once completely melted she added color, and stirred. This is also where you would want to add scents if desired.


She sticks the grate of the EOS container into the lid, and pours the melted soap to the top. 

After being placed in the freezer for 20 minutes, this is what it looks like. nice and solid.

She popped the bottom on to the lid and...

Wa La, EOS Handsoap! It's so pretty :)


Way to go Lex! Awesome project 👍

Monday, September 7, 2015

It's a Fiesta!

Throwing a fiesta? Here are a few fun ideas I did with my husband's birthday a few weeks ago :)

Our menu was simple:

Enchilada Style Burritos
Watermelon
Salsa Bar with white, yellow and blue tortilla chips, and a variety of salsa
Margarita Station
Corona
Soda Pop/water bottles
Cup Cakes

Decor was simple too:

Tissue paper flowers on the ceiling
A beautiful blanket I used as a tablecloth
A pinata

For the watermelon I covered a sombrero with plastic wrap, and lined the brim with the melon.

The salsa bar was fun and simple to put together.  I picked out a variety of mild, medium and hot salsas.  A few different flavors I chose were pineapple, roasted tomato and green chili.


Tissue paper flowers added a nice pop of color :)

The cupcakes turned out really cute.  My sis in law and I arranged them into a fun guitar shape, and decorated with white and black icing.


We had such a great time with all the friends and family that attended.  A special thanks to the musicians that brought their instruments, and played us all music around the fire into the night.  I know this was a birthday my husband won't soon forget :)